
Andersen 400 Series windows offer energy efficiency and durability, ideal for new construction or remodeling projects․ This guide provides step-by-step installation instructions for a secure and weather-tight fit, ensuring optimal performance and warranty compliance․ Proper techniques and tools are essential for a successful installation process․
Overview of Andersen 400 Series Windows
Andersen 400 Series windows are known for their energy efficiency and durability, featuring triple-pane glass options for enhanced thermal performance․ Designed for new construction, remodeling, or replacement projects, these windows offer a sleek design with Perma-Shield exterior cladding, requiring minimal maintenance․ Available in various styles, including double-hung, gliding, casement, and tilt-wash models, the 400 Series caters to diverse architectural needs․ Their weather-resistant construction ensures long-lasting performance, while innovative features like impact-resistant glass provide added security․ These windows are a popular choice for homeowners seeking a balance of style, functionality, and energy savings․
Importance of Proper Installation
Proper installation of Andersen 400 Series windows is crucial for optimal performance, energy efficiency, and durability․ Ensuring a weather-tight seal and correct alignment prevents air leaks and water damage․ Following manufacturer guidelines guarantees safety and prevents potential hazards․ Incorrect installation can lead to operational issues and void the warranty․ It’s essential to adhere to Andersen’s instructions to maximize the windows’ benefits and ensure long-term satisfaction․
Preparation Steps for Installation
Before installing Andersen 400 Series windows, ensure the area is clear of debris and obstructions․ Verify the rough opening matches the window dimensions and is structurally sound․ Gather all necessary tools and materials, including weatherproofing supplies and safety gear․ Review Andersen’s installation guide for specific requirements and follow safety protocols to prevent accidents․ Proper preparation ensures a smooth installation process and optimal window performance․ Aligning with manufacturer guidelines is crucial for a secure and weather-tight fit․
Pre-Installation Requirements
Verify the rough opening matches window dimensions, ensure structural integrity, and check for proper safety measures․ Follow Andersen’s guidelines to prepare for a successful installation․
Checking the Rough Opening
Ensure the rough opening is square, plumb, and level․ Measure the width and height to confirm it matches the window dimensions․ Check for any structural damage or obstructions․ Verify the opening is free from debris and properly framed․ Ensure the sill is level and the sides are plumb to guarantee proper window alignment and installation․ Address any issues before proceeding to avoid installation complications․ Proper preparation of the rough opening is critical for a secure and weather-tight fit․
Verifying Window Dimensions
Measure the Andersen 400 Series window to ensure it matches the rough opening dimensions․ Compare the window’s width and height with the opening, checking for proper orientation․ Use a tape measure to confirm accuracy, as incorrect sizing can lead to installation issues․ Refer to the product specifications or the Andersen Installation Guide for exact measurements․ Ensure the window is correctly oriented (e․g․, double-hung, casement) to fit the opening․ Proper alignment is crucial for functionality and weatherproofing․ Verify dimensions before proceeding to avoid costly rework or potential warranty voidance due to improper fitting․
Ensuring Proper Safety Measures
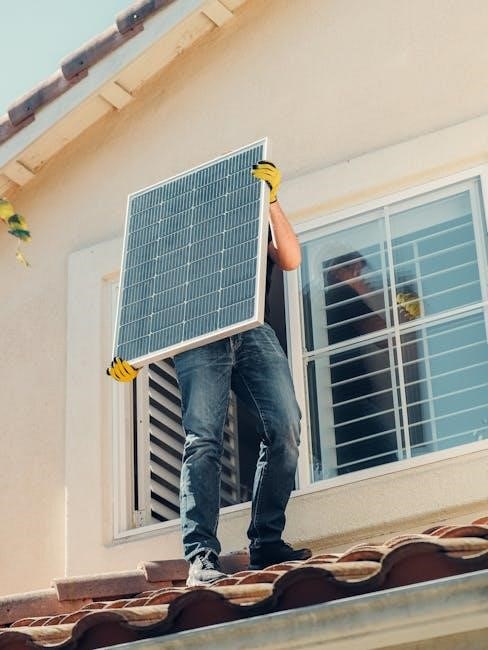
Always wear safety gear, including gloves and safety glasses, when handling Andersen 400 Series windows․ Ensure the work area is clear of debris and obstacles to prevent tripping․ Use proper lifting techniques to avoid injury, as windows can be heavy․ If working at heights, secure the ladder or scaffold firmly․ Be cautious of sharp edges and glass fragments․ Follow all manufacturer guidelines for handling and installing windows․ Keep children and pets away from the installation site․ Ensure proper ventilation and avoid overexertion․ Use appropriate tools designed for the task to maintain control and safety throughout the installation process․ Prioritize caution to protect both people and the product․

Tools and Materials Needed
Essential tools include a level, measuring tape, utility knife, and screwdrivers․ Materials needed are weatherproofing sealants, shims, and fasteners for secure installation․
Essential Tools for Installation
The installation of Andersen 400 Series windows requires specific tools to ensure accuracy and safety․ A level is crucial for proper alignment and plumb placement․ A measuring tape helps verify dimensions and spacing․ Use a utility knife for cutting weatherproofing materials․ Screwdrivers (both Phillips and flathead) are necessary for securing the window․ Additional tools include shims for leveling, a caulk gun for sealing, and a drill for pre-drilling screw holes․ Proper tools ensure a professional-grade installation, preventing issues like misalignment or water leaks․
Required Materials for Weatherproofing
For a weather-tight installation of Andersen 400 Series windows, essential materials include flashing to prevent water infiltration and weatherproofing barriers like waterproof membranes․ Apply silicone or polyurethane sealants around the window perimeter to ensure airtight seals․ Foam board insulation may be used to fill gaps, while flashing tape reinforces the rough opening․ These materials protect against moisture damage and air leaks, ensuring long-term performance and energy efficiency․ Proper use of these items is critical for maintaining the window’s warranty and functionality․
Additional Accessories for Secure Installation
For a secure and durable installation of Andersen 400 Series windows, several accessories are recommended․ These include shims to ensure proper alignment and sill pans to manage water runoff․ Foam spacers can be used to maintain insulation and fit without compromising the seal․ Additional hardware like brackets and fasteners may be necessary for specific installations․ These accessories enhance stability and weatherproofing, ensuring a long-lasting and secure fit․ Always use Andersen-approved materials to maintain compatibility and warranty compliance․ Proper use of these items guarantees optimal performance and protection against environmental factors․

Step-by-Step Installation Process
The Andersen 400 Series window installation involves preparing the rough opening, sealing for weatherproofing, shimming for alignment, fastening securely, and applying flashing for water management․
Preparing the Rough Opening
Preparing the rough opening is the first critical step in installing Andersen 400 Series windows․ Ensure the opening is clean, level, and properly sized․ Check for any debris or obstructions and remove them․ Verify that the opening is square and the sides are plumb․ Use a level to confirm the sill is even, and make adjustments if necessary․ Install shims where needed to ensure proper alignment․ A well-prepared opening guarantees a stable base for the window, ensuring smooth installation and optimal performance․ Proper preparation prevents future issues like air leaks or misalignment․
Sealing the Opening for Weatherproofing
Sealing the rough opening is essential for weatherproofing and energy efficiency․ Apply a layer of approved flashing material to the sill and jambs, ensuring complete coverage․ Use weatherproofing sealants around the perimeter to prevent air leaks and moisture infiltration․ Install flashing tape according to Andersen’s guidelines, pressing firmly to ensure adhesion․ Seal any gaps between the window frame and the opening to create a tight, weather-resistant seal․ This step is critical for maintaining the window’s performance and structural integrity over time․ Proper sealing prevents water damage and ensures long-term durability of the Andersen 400 Series window installation․
Shimming the Window for Proper Alignment
Shimming ensures the Andersen 400 Series window is properly aligned and level․ Place shims in the side and bottom pockets of the window frame to achieve plumb and level positioning․ Use a spirit level to verify alignment, adjusting shims as needed․ Once aligned, secure the shims firmly to maintain the window’s position․ Proper shimming prevents operational issues and ensures a square fit within the rough opening․ Follow Andersen’s guidelines for shim placement to guarantee optimal performance and avoid misalignment, which could lead to functional difficulties or air leaks over time․
Fastening the Window Securely
Securely fastening the Andersen 400 Series window is critical for stability and performance․ Use high-quality screws or nails to attach the window to the surrounding studs, ensuring they are spaced evenly and driven straight․ Start by fastening the bottom flange first, then proceed to the sides and top․ Avoid over-tightening, which can distort the frame․ Double-check that the window is level and plumb before finalizing the fastening process․ Proper fastening prevents shifting and ensures a tight seal, enhancing energy efficiency and durability․ Always follow Andersen’s specific fastening guidelines for optimal results and warranty compliance․
Flashing and Water Management
Flashing and water management are essential for preventing water infiltration and ensuring the longevity of your Andersen 400 Series windows․ Start by installing flashing around the window perimeter, ensuring it is properly sealed and aligned with the rough opening․ Use compatible flashing materials, such as peel-and-stick or metal, to create a watertight barrier․ Direct water away from the window by sloping the flashing downward․ Ensure the flashing integrates seamlessly with the surrounding weatherproofing system, such as house wrap or weather-resistant barriers․ Proper flashing installation protects against moisture damage and maintains the window’s structural integrity․ Always follow Andersen’s guidelines for effective water management․

Specific Installation Considerations
Flashing and water management are critical steps in Andersen 400 Series window installation․ Apply peel-and-stick flashing around the rough opening, ensuring a watertight seal․ Direct water away by sloping the flashing downward․ Integrate the flashing with the weatherproofing system, such as house wrap, to prevent moisture infiltration․ Follow Andersen’s guidelines for proper installation to maintain structural integrity and prevent water damage․ This step ensures long-term performance and protects against weather-related issues․
Installing Andersen 400 Series Double-Hung Windows
For Andersen 400 Series Double-Hung Windows, start by preparing the rough opening according to Andersen’s specifications․ Ensure proper alignment and leveling before shimming․ Apply weatherproofing materials like flashing and sealant around the opening to prevent water intrusion․ Insert the window unit, securing it with screws through the flanges․ Use shims to adjust for proper plumb and level․ Install the sash stops and hardware, ensuring smooth operation․ Follow the Andersen Installation Guide Configurator for detailed steps․ Proper installation ensures energy efficiency, durability, and optimal performance of the double-hung window design․
Installing Andersen 400 Series Gliding Windows
Andersen 400 Series Gliding Windows feature an active and passive sash design for smooth operation․ Begin by preparing the rough opening, ensuring it is level and properly sealed․ Install the active sash first, aligning it with the frame, and secure it using the provided hardware․ Next, attach the passive sash, ensuring proper alignment and smooth gliding motion․ Apply weatherproofing materials around the perimeter for a tight seal․ Follow the Andersen Installation Guide Configurator for specific instructions․ Proper installation ensures energy efficiency, durability, and effortless functionality of the gliding window design․
Installing Andersen 400 Series Casement Windows
Andersen 400 Series Casement Windows are known for their crank-out design and energy-efficient performance․ Begin by preparing the rough opening, ensuring it is level and properly sealed․ Mount the window frame, aligning the hinges correctly, and secure it with fasteners․ Attach the crank handle, ensuring smooth operation․ Apply weatherproofing materials around the perimeter for a tight seal․ Follow Andersen’s installation guide for precise measurements and alignment․ Proper installation ensures optimal airflow, security, and energy efficiency, while maintaining the window’s durability and functionality over time․
Installing Andersen 400 Series Tilt-Wash Windows
Andersen 400 Series Tilt-Wash Windows are designed for easy cleaning and maintenance․ Begin by preparing the rough opening, ensuring it is square and properly sealed․ Carefully lift and place the window unit into the opening, aligning the hinges with the frame․ Secure the window using the provided fasteners, ensuring it is level and plumb․ For the tilt function, attach the sashes to the hinges and test the mechanism for smooth operation․ Apply weatherproofing materials around the perimeter for a watertight seal․ Follow Andersen’s specific installation guide for precise instructions to ensure proper functionality and energy efficiency․ Proper alignment and sealing are critical for long-term performance․

Post-Installation Steps
Complete the installation by finishing the interior and exterior, ensuring all surfaces are sealed and weatherproofed․ Test window functionality to confirm smooth operation and proper alignment․ Inspect for any gaps or leaks to ensure airtight performance and energy efficiency․
Finishing the Interior and Exterior
After securing the window, focus on finishing touches․ Install interior trim and molding to cover any gaps, ensuring a seamless look․ On the exterior, apply flashing and weatherproofing materials around the window frame to prevent water infiltration․ Caulk all joints and seams for airtight sealing․ Paint or finish the trim to match your home’s aesthetic․ Finally, inspect both the interior and exterior for proper alignment and weatherproofing․ Ensure all finishing materials are securely fastened and sealed to maintain energy efficiency and durability․
Testing Window Functionality
After installation, test the window’s functionality to ensure proper operation․ Open and close the window multiple times to verify smooth movement and alignment․ Check that all locking mechanisms engage securely and release effortlessly․ For double-hung and casement windows, ensure the sashes operate without resistance; Test for air leaks by holding a lit candle or incense near the edges to detect any drafts․ Inspect the weatherstripping for proper sealing․ If any issues arise, address them immediately to maintain energy efficiency and performance․ Proper functionality ensures long-term durability and satisfies warranty requirements․
Ensuring Proper Sealing and Performance
After installation, inspect the window for any gaps or misalignments that could compromise sealing․ Ensure all weatherstripping is properly seated and not compressed unevenly․ Check the flashing around the window to confirm it directs water away effectively․ Test for air leaks by holding a lit candle near the edges; flickering indicates a draft․ Address any issues promptly to maintain energy efficiency․ Proper sealing prevents moisture infiltration and ensures long-term performance․ Follow manufacturer guidelines for weatherproofing to uphold the window’s warranty and durability․
Safety and Best Practices
Always wear protective gear, ensure a clear workspace, and use tools correctly․ Adhere to safety standards to prevent accidents and ensure a smooth installation process․
Handling Glass Safely
Always wear protective gloves and safety glasses when handling glass to prevent injuries․ Lift glass panels carefully, ensuring a firm grip using suction cups or handles provided․ Avoid sudden movements or impacts that could cause breakage․ Store glass panels securely in an upright position, away from construction debris․ Use extreme caution when placing or removing glass to prevent shattering․ Andersen windows may not include safety glass unless specified, so proper handling is crucial to avoid accidents and ensure a safe installation process․ Follow all safety guidelines provided in the installation manual for optimal results․
Using Proper Lifting Techniques
Proper lifting techniques are essential to prevent injury and ensure safe installation of Andersen 400 Series windows․ Always use a reasonable number of people with sufficient strength to lift and carry window units․ Maintain control throughout the process to avoid accidents․ Bend at the knees and lift from the base, keeping the window close to your body․ Avoid twisting or overreaching, which can lead to strain or damage․ Use mechanical aids like dollies or lifts if necessary․ Follow Andersen’s guidelines for safe handling to protect both the installers and the product, ensuring a secure and damage-free installation process․
Following Manufacturer Guidelines
Adhering to Andersen’s installation guidelines is crucial for ensuring a successful and warranty-compliant installation of 400 Series windows; Use the Andersen Installation Guide Configurator to access specific instructions tailored to your product․ Always prepare the site according to the manufacturer’s recommendations, ensuring proper tools and materials are on hand․ Understand and follow the step-by-step instructions for your specific window type, whether it’s a double-hung, gliding, or casement model․ Compliance with safety standards and best practices is essential to prevent damage and ensure optimal performance․ If unsure about any step, consult Andersen’s customer support for clarification․

Maintenance and Care
Regular maintenance ensures Andersen 400 Series windows perform optimally․ Clean the windows and frames regularly, inspect for damage, and follow manufacturer guidelines for care and functionality․
Cleaning Andersen 400 Series Windows
Regular cleaning is essential to maintain the appearance and functionality of Andersen 400 Series windows․ Use a mild detergent and soft cloth to wipe down frames and glass․ Avoid abrasive cleaners or materials that may scratch surfaces․ For sashes and tracks, remove debris with a soft brush or vacuum․ Clean glass with a streak-free cleaner and lint-free cloth or paper towels․ Avoid cleaning in direct sunlight to prevent streaks․ Inspect and clean weep holes to ensure proper water drainage․ Cleaning should be done seasonally or as needed to maintain clarity and performance․ Always follow Andersen-recommended cleaning methods for best results․
Maintaining Hardware and Moving Parts
Regular maintenance ensures smooth operation of Andersen 400 Series windows․ Lubricate hinges and rollers annually with a silicone-based spray to prevent wear․ Inspect and tighten screws or clips securing hardware; Clean tracks and sashes with a soft brush or vacuum to remove debris․ Avoid using harsh chemicals, as they may damage finishes․ For tilt-wash models, check pivot bars and balance arms for proper alignment․ Refer to Andersen’s maintenance guidelines for specific product care․ Addressing minor issues promptly extends the lifespan of moving parts and maintains optimal performance․ Always use Andersen-recommended products to ensure warranty compliance and longevity․
Inspecting for Damage or Wear
Regularly inspect Andersen 400 Series windows for signs of damage or wear to ensure optimal performance․ Check weatherstripping for tears or compression loss and replace if necessary․ Examine glass panes for cracks or fogging, which may indicate seal failure․ Inspect frames and sashes for warping, rot, or paint deterioration․ Look for loose or corroded hardware and tighten or replace parts as needed․ Ensure proper alignment of moving parts, such as hinges and rollers, and address any operational difficulties promptly․ Inspections should be done seasonally, especially after extreme weather conditions, to maintain durability and energy efficiency․ Addressing issues early prevents costly repairs․
Resources and Support
Andersen offers comprehensive resources, including installation guides and a Configurator tool, to assist with 400 Series window projects․ Contact customer support at 1-888-888-7020 for assistance․
Accessing Andersen Installation Guides
To ensure a successful installation, Andersen provides detailed guides for the 400 Series․ Use the Andersen Installation Guide Configurator tool to find specific instructions for your window type․ Guides are available in PDF format for download on the Andersen website․ They cover preparation, sealing, shimming, and fastening processes․ The Configurator is accessible online, offering tailored instructions for a precise fit․ These resources ensure compliance with manufacturer recommendations, guaranteeing warranty validity and optimal window performance․ Visit the Andersen website to access these tools and download the necessary guides for your 400 Series installation project․
Using the Andersen Installation Guide Configurator
The Andersen Installation Guide Configurator simplifies the process by providing tailored instructions for 400 Series windows․ Visit the Andersen website and select the 400 Series from the product menu․ Input specific details about your window type, such as double-hung, gliding, or casement․ The Configurator generates a personalized guide, covering preparation, sealing, shimming, fastening, and flashing․ This tool ensures accurate and efficient installation, reducing errors and saving time․ Follow the step-by-step instructions to achieve a secure, weather-tight fit․ Proper use of the Configurator guarantees compliance with manufacturer guidelines, ensuring optimal performance and warranty validity for your Andersen 400 Series windows․
Contacting Andersen Customer Support
For assistance with Andersen 400 Series window installation, contact their customer support team at 1-888-888-7020, available Monday through Friday, 7 AM to 5 PM CT․ Representatives are ready to address installation questions, troubleshooting, or general inquiries․ Additionally, the Andersen website provides access to installation guides, videos, and resources․ Use the Installation Guide Configurator for tailored instructions or download specific PDF guides for 400 Series models․ Reaching out ensures proper installation, resolving issues promptly, and maintaining optimal product performance and warranty coverage․ Their support team is dedicated to helping you achieve a successful installation․
Troubleshooting Common Issues
Address air leaks by sealing gaps and ensuring proper flashing․ Correct window alignment by adjusting shims․ Resolve operational difficulties by lubricating moving parts and checking hardware for damage․
Addressing Air Leaks or Drafts
Air leaks or drafts in Andersen 400 Series windows can often be traced to improper sealing or installation․ Inspect the window frame and surrounding areas for gaps․ Use a candle flame or incense to detect air movement near seals․ Apply additional weatherproofing materials like spray foam or caulk to fill gaps․ Ensure proper flashing around the window opening to prevent water infiltration and air leaks․ Verify that all installation steps, including shimming and sealing, were followed correctly․ If issues persist, consult Andersen’s installation guide or contact customer support for further assistance․
Fixing Improper Window Alignment
Improper window alignment can affect functionality and energy efficiency․ Check the shims and ensure they are properly set to maintain the window’s level and plumb position․ Adjust the window frame by loosening the fasteners, then reposition and realign the unit․ Tighten the screws securely but avoid over-tightening, which can cause further misalignment․ Verify alignment using a level and ensure proper operation of moving parts․ If issues persist, consult Andersen’s installation guide for specific adjustment procedures․ Proper alignment ensures smooth operation and optimal performance of your Andersen 400 Series windows․
Resolving Operational Difficulties
Addressing operational issues with Andersen 400 Series windows involves checking alignment, ensuring proper hardware function, and verifying weatherproofing․ Consult the installation guide for troubleshooting steps․ Lubricate moving parts if necessary and ensure all fasteners are securely tightened․ Proper alignment and sealing are crucial for smooth operation․ If difficulties persist, refer to Andersen’s support resources or contact customer service for assistance․ Regular maintenance and adherence to manufacturer guidelines help prevent operational problems and ensure longevity․